The Mead Maker’s Toolkit: Essential Equipment for Every Brewer
If you’ve ever toyed with the idea of turning honey into gold (the liquid kind, that is), welcome to the world of mead making.
Where your kitchen turns into a medieval workshop, and your creativity takes flight. Whether you’re just starting out or looking to level up, having the right gear can make the difference between a forgettable first batch and a glistening ambrosia fit for the gods. In this article, I’ll walk you through the essential tools for every mead maker’s toolkit.
The Core Four: Fermenters, Airlocks, Stirring Wands, and Sanitizers
Before we get fancy with digital hydrometers (like Tilt) and pH meters, let’s focus on the basics. Think of these as the four pillars of your mead-making temple.
- Fermenter
- Airlock
- Stirring Wand
- Sanitizer
When you’ve got these dialed in, you’re already 80% of the way to sipping your own delicious honey wine.
Fermenters: Picking the Right Vessel
One of the first (and biggest) decisions you’ll face is choosing a fermenter. The type you select can have a surprising impact on the final product. Let’s break down the common options:
Plastic Fermenters
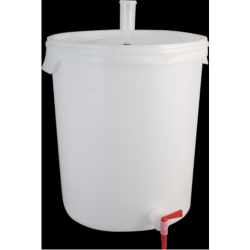
- Pros:
- Lightweight and easy on your arms (especially if you’re hauling 5 gallons of honey water).
- Generally more affordable.
- Perfect for beginners who might not want to invest heavily right out of the gate.
- Cons:
- Can scratch easily, making them harder to sanitize over time.
- May stain or retain odors from previous batches if not cared for properly.
- When to Use:
- Great for primary fermentations, but not for secondary or aging.
- If you’re still experimenting with recipes and want a budget-friendly start.
- Great for quick turnover meads or smaller trial batches.
Glass Carboys
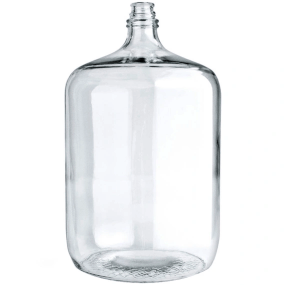
- Pros:
- Non-porous surface is a dream to sanitize.
- No risk of scratching the interior.
- Allows you to see the fermentation process (bubbling yeast = pure joy).
- Cons:
- Heavier and more cumbersome to move.
- More expensive upfront.
- Can shatter if mishandled (and that’s a sticky, glassy mess).
- When to Use:
- For big, long-term projects where clarity is key, and you want minimal oxygen ingress.
- If you appreciate the visual spectacle of yeast working its magic.
Stainless Steel Fermenters
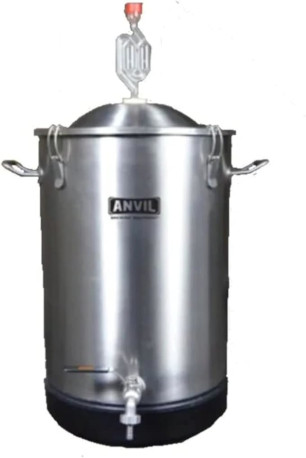
- Pros:
- Durable, long-lasting, and super easy to sanitize.
- Often come with built-in valves or thermowells, which can make racking or temperature control a breeze.
- Resist scratching and keep oxygen out effectively.
- Cons:
- High initial cost.
- Might be overkill if you’re not committed to brewing as a long-term hobby.
- When to Use:
- If you’re ready to go pro or want maximum control and cleanliness.
- Great for large batch sizes and repeated use.
Conical Fermenters
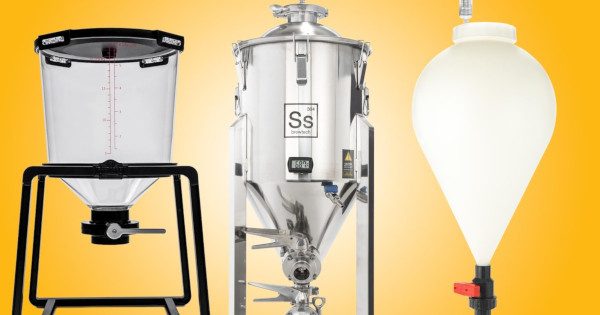
- Pros:
- Designed for easy removal of sediment and yeast (thanks to that tapered bottom).
- Make secondary transfers easier and reduce oxidation.
- Cons:
- Pricey, and they take up a bit more space.
- When to Use:
- Advanced brewers looking to streamline the process.
- If you’re making several batches in succession and want quick, clean transfers.
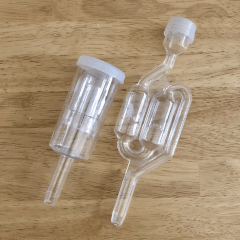
Airlocks: The Gatekeepers of Fermentation
Airlocks might look like little plastic doodads, but they play an essential role: letting carbon dioxide (CO2) out while keeping oxygen (and pesky contaminants) from sneaking in. Two common types are:
S-Shaped Airlocks
- Pros:
- Simple and reliable, easy to see airlock activity.
- Typically cheaper.
- Cons:
- Slightly more fiddly to clean.
- Not the greatest if you expect a super vigorous fermentation (they can get clogged if the krausen reaches too high).
Three-Piece Airlocks
- Pros:
- Easier to clean thoroughly.
- Can handle a more robust fermentation without clogging as easily.
- Cons:
- You may need to top up the water more frequently.
- Pro Tip: Some folks use vodka instead of water for extra protection, but regular water plus sanitizer works well too.
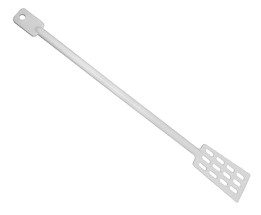
Stirring Wands: Because Mixing Really Matters
Once you’ve got your honey and water mixture (the “must”), you’ll need to keep it stirred. Oxygen is crucial at the start of fermentation to help yeast thrive.
- Stainless Steel Spoon or Paddle: Durable, easy to clean, and gentle on your fermenter if used properly.
- Plastic Stirring Wand: Lightweight and inexpensive, but watch out for scratches if you’re using it in a plastic bucket.
- Degassing Wand (Drill Attachment): If you’re dealing with larger volumes, hooking this up to a drill can make short work of stirring and degassing. Just be mindful not to create a whirlpool of doom that spills all over your kitchen.
Sanitizers: The Unsung Heroes
You’ve got your fermenter, your airlock, and your stirring wand—great! But none of these matter if they’re not squeaky clean. Sanitizer isn’t optional. It’s essential.
- No-Rinse Sanitizers (like Star San):
- Mix with water, dunk your gear, and you’re good to go.
- Don’t fear the foam! It won’t harm your mead and actually helps create a protective layer.
- Iodophor:
- Effective, but can stain certain plastics a light brown.
- Also no-rinse when properly diluted.
Sanitizing Tips:
- Make sure to sanitize all surfaces that come into contact with your mead—fermenters, spoons, airlocks, stoppers, and even your hands or gloves.
- Keep a spray bottle filled with sanitizer on hand to quickly mist anything that might touch your must.
Bonus Gear: When You’re Ready to Level Up
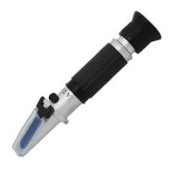
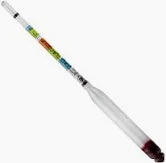
- Hydrometer/Refractometer: Helps you measure sugar content (Original Gravity vs. Final Gravity). This is how you tell if your fermentation’s done—or if you’re at risk of bottle bombs. Used to determine you %ABV (Alchol by Volume) too!
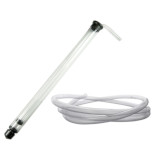
- Auto-Siphon: Transfer your mead with minimal fuss and lower oxidation risk.
- Thermometer Strips or Digital Thermometers: Temperature control is key for consistent results.
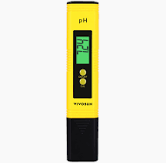
- pH Meter: If you’re delving into more advanced techniques, monitoring pH can save a batch from going awry.
Bringing It All Together
Your mead-making journey can be as simple or as complex as you want it to be. Start with the basics—a decent fermenter, an airlock, a stirring wand, and a reliable sanitizer. As you hone your craft, you can upgrade to fancy stainless steel or conical fermenters and add specialized gadgets to your arsenal.
But remember, even the swankiest equipment is no substitute for good technique, cleanliness, and a dash of patience. After all, mead is an ancient beverage that rewards the careful and the curious. So go forth, gather your tools, and may your next batch of honey wine be the stuff of legends!
Skål!
